How to Crochet a Baby Hat With Ear Flaps
Looking to add ear flaps to a crocheted beanie? You are in luck, friend! In this tutorial we will talk over how to add ear flaps with any yarn to any crocheted beanie of any size! Nosotros'll learn where to place ear flaps on a crochet chapeau using our handy ear flaps size chart beneath.

How to Add Ear Flaps to a Crochet Beanie
Of grade no two heads are the same, but because nosotros know the average size of the average human head at various ages and stages of growth, nosotros tin can calculate how wide and how long the ear flaps on a beanie should be for any given size. Ear flaps first out wide and get more than narrow as they get down. In society to do this you lot'll need to know how to do the Double Crochet and how to practise a Double Crochet Decrease (dc2tog).

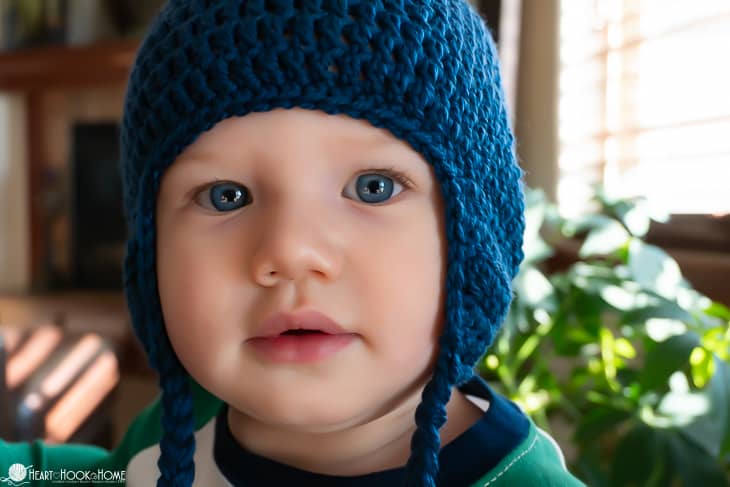
For my nephew'due south hat I am using Twill yarn from WeCrochet in the Dungaree colorway, and the ruby beneath is Wool of the Andes in Hollyberry. How ambrosial is he?!

When adding ear flaps to a beanie, you'll first want to crochet said beanie. For instructional purposes nosotros need a basic beanie that will piece of work with whatsoever tension, then nosotros're going to utilize my beginner-friendly Primary Beanie blueprint. Keep in mind that all measurements are estimates and that your personal tension may bear on the overall size of your finished product. Your tape measure is your all-time friend!
Go alee and crochet up a Chief Beanie, then come back to this post to add the flaps.


1. Lay beanie out flat and plot out the placement. It may be helpful to use run up markers to marking the width of each ear flap and the distance between them before really starting to crochet. The virtually important affair hither is to keep each ear flap the same number of stitches. In this case I am making a teen (small-scale developed) size ear flap beanie for myself, and so I know that I want each ear flap to exist approximately iii.v″ broad.
Next count the stitches in between each ear flap (both forepart and dorsum) to make sure that there are equal stitches all around. Make adjustments equally needed, and when you've finished plotting out the placement yous're ready to start crocheting.
2. Outset your first ear flap! Chain to start a new row of crochet – remember, in this example I'm using double crochet and then I'll chain two to kickoff a new row (more than on that here). In the offset row I have 12 double crochet stitches for 3.5″.

3. If making for a child, skip to step 4. If making a teen or an adult size, you'll want to add i more row using the same number of stitches. This makes the flaps merely a flake longer.

4. For the next row we are going to begin the tapering of the ear flap. To do this you lot'll identify 1 decrease (dc2tog) at the beginning of the row and i subtract at the end of the row. Here nosotros are going from 12 double crochet stitches down to 10.

5. In the next row we continue tapering, over again placing one decrease (dc2tog) at the beginning of the row and one decrease at the cease of the row. This will take our stitch count in the example from ten stitches down to 8 stitches.

vi. For our last row we will decrease on each end ane more fourth dimension, taking our concluding stitch count in the example down to half-dozen stitches. We at present have a total of v rows for teen or adult and iv rows for all smaller sizes.

Fasten off and attach in the designated spot to start the second ear flap. Exercise the exact same affair you just did on the other side, except this time practise NOT fasten off. Instead we'll crochet effectually the unabridged bottom edge giving the beanie and the ear flaps a cleaner, more than polished look.


Simply place one single crochet in each sew or row stop around the unabridged chapeau. Ta-da! Doesn't that look cleaner than earlier?

Add together braids if y'all like. I typically cut 6 identical long strands of yarn, then feed them halfway through the end of the flap. This gives you 12 strands of yarn that you tin can then braid as long as you like. Tie a knot and trim the ends.

Was adding ear flaps to your beanie easier than y'all thought? I hope so, and I hope y'all enjoyed this tutorial! When y'all're finished I'd dear to run across a photo of yours. Tag me by using @HeartHookHome on Instagram and Twitter, or share in the Middle Hook Habitation Crochet Customs on Facebook.

More crochet tutorials:
How to Size Crochet Beanies + Principal Beanie Pattern
How to Crochet the Thicket (Suzette) Stitch
How to Block Crochet: Wet or Steam Blocking Tutorial
Russian Bring together Tutorial for Crochet and Knitting
3rd Loop One-half Double Crochet (Video Tutorial)
shepherdpurecooke.blogspot.com
Source: https://hearthookhome.com/how-to-add-ear-flaps-to-a-crochet-beanie/
0 Response to "How to Crochet a Baby Hat With Ear Flaps"
Post a Comment